

Convert Logo to PXF File Format: Complete Digitizing Guide
Need your logo in PXF format? Our complete guide explains what PXF files are, which machines use them, and the step-by-step process for professional conversion and digitizing
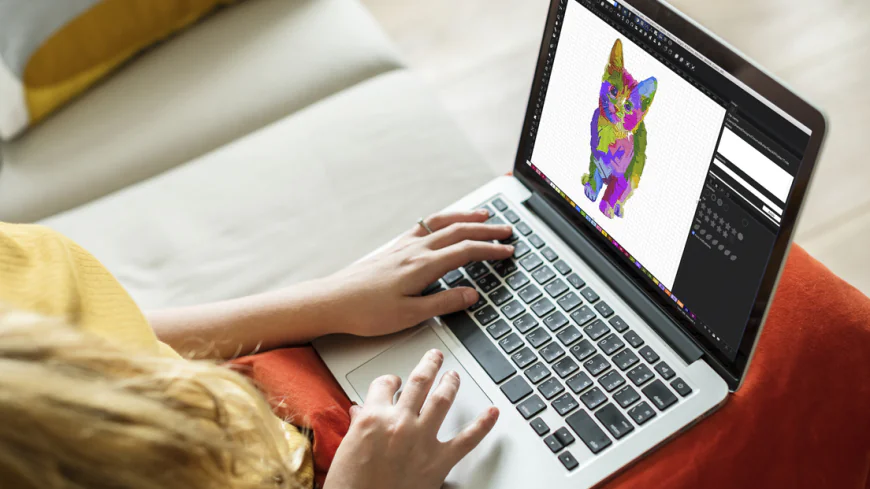
 digitizingbuddy3
You have a logo ready for embroidery, and your specific machine or professional partner has requested it in a PXF file. If you're staring at a JPG or PNG and wondering how to bridge that gap, you're in the right place. The process to Convert Logo to PXF File Format is more than a simple file save-as; it's a specialized digitizing workflow that ensures your design is perfectly translated for compatible industrial embroidery systems. This guide will demystify the PXF format, explain the machinery behind it, and walk you through the precise steps—from preparing your artwork to generating the final, production-ready file.
What Exactly is a PXF File?
First, let's clear up the confusion. PXF is a proprietary embroidery file format primarily associated with Pfaff and Viking embroidery machines. It stands as a native format for these systems, much like .PES is for Brother or .JEF is for Janome. However, PXF isn't just a simple stitch data container like a .DST. It's often a more complex project file that can contain not only the stitch commands but also additional design information, color palettes, and editing capabilities specific to the software ecosystem of these machines.
Think of it this way: If a .DST file is a finalized PDF meant only for printing, a .PXF file can sometimes be more like an editable Adobe InDesign document. It’s the format used within certain professional software suites (like Pfaff's Creative Designer) to save and work on designs before exporting them to a simpler, stitch-only format for the machine itself. When someone requests a PXF, they are typically using a Pfaff/Viking-based workflow and want the editable project file for maximum flexibility.
The Machines and Software Behind the Format
Understanding who uses PXF files clarifies the why behind the request.
-
Primary Machines: Industrial and high-end hobbyist machines from Pfaff and Husqvarna Viking.
-
Key Software: The format is native to software suites like:
-
Pfaff Creative Designer
-
Viking Embroidery Software
-
Bernina ArtLink (in certain versions, as Bernina, Pfaff, and Viking have shared software histories).
-
-
The Implication: If you're sending a file to a large-scale production house using Pfaff industrial machines, or to a designer using Viking software, a PXF file gives them the ability to fine-tune, edit colors, or adjust sizing without needing to go back to the original source art.
Step 1: Preparing Your Artwork for Professional Digitizing
The journey to a clean PXF file starts with the quality of your source logo. Garbage in equals garbage out.
-
Demand Vector Files: A professional digitizer's best friend is a vector file. Provide your logo as an
.AI,.EPS,.PDF, or.SVG. These formats use mathematical paths, not pixels, allowing for infinite scaling and razor-sharp edges in the final embroidery. This is non-negotiable for a quality result. -
Simplify and Clean: Examine your logo. Are there tiny details, gradients, or ultra-thin lines? These may need to be simplified or adapted for the embroidery medium. A good rule of thumb: if a detail is smaller than 1mm, it likely won't stitch cleanly. Be prepared to discuss these elements with your digitizer.
-
Know Your End Use: Be ready to answer critical questions: What type of fabric will this be stitched on? (e.g., a stiff canvas bag, a stretchy polo, a structured cap). What are the final dimensions? This information directly impacts how the digitizer sets parameters like stitch density and underlay.
Step 2: The Digitizing Process – Where the Magic Happens
This is the core of the conversion. A trained digitizer uses professional software to translate your flat logo into a stitch-by-stitch blueprint. While some software offers auto-digitizing, true quality requires manual, artistic digitizing.
Critical Steps in the Digitizer's Workflow:
-
Artwork Analysis: The digitizer assesses your logo's shapes, colors, and details to plan the stitch strategy.
-
Manual Pathing & Object Creation: Using software like Wilcom Hatch or Embrid, they manually trace and define each element of your logo, assigning stitch types:
-
Fill Stitches: For solid color blocks.
-
Satin Stitches (Column Stitches): For borders, text, and fine lines.
-
Running Stitches: For very fine details or outlining.
-
-
Applying Embroidery Physics: This is what separates pros from auto-converters. The digitizer applies:
-
Underlay: A foundational layer of stitches that stabilizes the fabric and prevents puckering.
-
Pull Compensation: Slightly widening shapes to account for fabric pull from the thread tension, ensuring shapes sew out to their correct visual size.
-
Stitch Density & Direction: Setting how close together stitches are (based on fabric) and their angle, which affects texture and strength.
-
-
Sequencing & Optimization: The digitizer orders the color changes and object sewing sequence to minimize thread trims and machine head jumps, creating an efficient production file.
Step 3: Exporting and Saving as PXF
Once digitizing is complete, the software-specific step arrives. The digitizer must use software that supports exporting or saving in the PXF format.
-
Using Compatible Software: The digitizer will work in their primary software but will use an export or "save as" function to generate the PXF. This may be a direct function in software like a Viking suite or a plugin/converter in other programs.
-
File Configuration: During export, they may set final parameters like design size that are embedded in the PXF project file.
-
The Final File: The output is your
.pxffile. This file can now be opened in Pfaff or Viking embroidery software for any final tweaks before being sent to the machine. Often, the digitizer will also provide a standard.DSTor.EXPfile alongside the PXF, as these are the universal stitch formats actually read by the industrial embroidery machines themselves.
What If You Need to Do It Yourself?
For hobbyists or those with simple logos, a DIY path exists, but it has limits.
-
Software Requirement: You need access to software that can create or export PXF. This typically means purchasing Pfaff Creative Designer or Viking embroidery software.
-
The DIY Process: You would follow the digitizing steps above within that software, learning to assign stitch types and set basic parameters. The software will then allow you to save your project natively as a
.pxf. -
The Reality Check: The learning curve is steep. Professional digitizing is a craft. For a business logo or important project, the cost and time of learning, plus the risk of a poor-quality result, almost always outweigh the fee of hiring a professional service.
Choosing a Professional Digitizing Service for PXF
This is often the most efficient and reliable route. When seeking a service:
-
Explicitly State Your Need: Clearly say, "I require the final file in PXF format for a Pfaff/Viking machine."
-
Provide Vector Art: As outlined above, this is crucial.
-
Expect Questions: A good service will ask about fabric, size, and end use. This is a sign of professionalism.
-
Request a Proof: Ask for a digital stitch preview (a sew-out simulation) before the final file is delivered.
Conclusion: More Than a Conversion, It's a Translation
Learning how to Convert Logo to PXF File Format is ultimately about understanding a specialized language within the embroidery world. It’s a process that respects the technical requirements of Pfaff and Viking systems while adhering to the universal principles of high-quality digitizing.
Whether you entrust this task to a professional service or embark on the DIY journey with the right software, remember that the goal is not just to change a file extension. The goal is to meticulously translate your two-dimensional brand identity into a three-dimensional, stitch-based reality that maintains its integrity, clarity, and impact on fabric. By focusing on pristine source artwork and leveraging expert digitizing skills, you ensure your PXF file is not just compatible, but optimized—ready to guide the needle in creating a perfect embroidered representation of your logo.


